MouseHouse 벽스위치 모델이 가장 yaml설정이 가장 까다롭습니다. 그래서 다른 회사 제품은 아래의 yaml 내용에서 LED 라인 정도 삭제하고 포트만 수정하면 전부 동작이 가능할 것입니다.
ESPHome 설치방법은 https://techclass.tistory.com/1 을 참고하세요.
- [더니즈]님의 글은 ESPHome의 기본 개념을 잡는데 정말 훌륭한 글이었습니다. 오랜 시행착오의 과정을 걱은 노하우까지 전수해 주는 주옥같은 글입니다. ESPHome 에 입문하는데 필독서입니다.
> esphome 강좌 : https://cafe.naver.com/stsmarthome/10417 [더니즈] ESPHome Tips #1~
- 벽스위치 yaml 스크립트 작성에 [레이군], [민쇼] 두분의 글에 매우 많은 도움을 받았습니다.
다시 한번 감사드립니다.
> 설정에 도움되는 글 : https://cafe.naver.com/stsmarthome/10897 [민쇼]님 글
https://cafe.naver.com/stsmarthome/10852 [레이군]님 님 글
> ESPHome 레퍼런스 : https://esphome.io/guides/automations.html
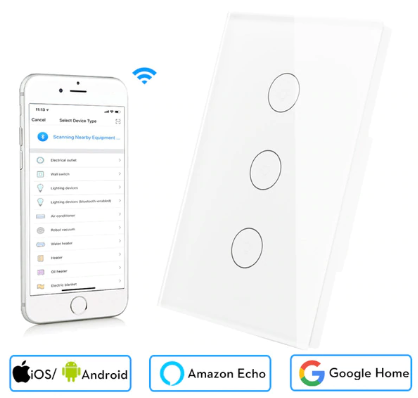
판매자 링크 : https://www.aliexpress.com/item/32857299145.html?spm=a2g0s.9042311.0.0.27424c4dyDlaNd
US $14.24 55% OFF|Wifi Smart Wall Touch Switch Glass Panel Mobile APP Remote Control No Hub Required work with Amazon Alexa Goog
Smarter Shopping, Better Living! Aliexpress.com
www.aliexpress.com
우선,
다른 스위치는 일반적으로 AC릴레이를 동작시키면 LED가 동작하기 때문에 gpio 포트도 찾기 쉽고 간단하게 제어가 됩니다.
이제품은 다른 벽스위치와 다르게, LED와 AC 전원을 제어하는 릴레이 포트가 별도로 되어있습니다. 그래서, 스크립트 작성에 좀 어려웠습니다. 포트를 쉽게 찾게 해준 글이 바로 [민쇼], [레이군] 두분의 글이 었습니다.
쓸때 없는 설명을 대신해서, 설정파일을 그냥 올립니다.
주석을 달아 놓았으니 아래 내용을 잘 분석하시면, 다른 장치 설정에도 도움이 될 것 같습니다.
나머지 부족한 부분은 검색을 통해서 채우셨으면 합니다.
1. "ESPHome > 장치 선택 > Edit"
저는 공유기에서 자동IP를 할당받는 방법을 사용했습니다. 고정IP 설정하고 싶으신분은 [더니즈]님 강좌를 보시고 수정하시면 됩니다. 필요한 부분 수정해서 붙여 넣으시면 됩니다.
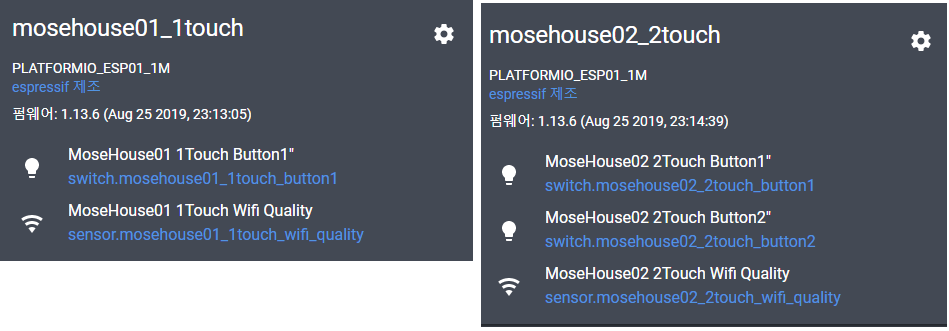
1) 1gang 벽스위치
## MoseHouse 1touch switch
## 아빠방

substitutions:
  node_name: mosehouse01_1touch
  device_name: MoseHouse01 1Touch

esphome:
  name: ${node_name}
  platform: ESP8266
  board: esp01_1m
  on_boot:
    priority: -50
    then:
      - delay: 10s
      - homeassistant.service:
          service: notify.theniz_telegram
          data:
            message: "Esphome ${device_name}이(가) 시작 되었습니다."

wifi:
  ssid: # WiFi SSID 기록
  password: # WiFi 암호 기록

logger:

api:

ota:

time:
  - platform: sntp
    timezone: UTC-9
    servers:
      - time.bora.net
      - 0.pool.ntp.org
      - 1.pool.ntp.org

sensor:
  - platform: wifi_signal
    name: "${device_name} Wifi Signal"
    id: wifi_sig
    internal: true
    update_interval: 60s
  - platform: template
    name: "${device_name} Wifi Quality"
    icon: "mdi:wifi"
    update_interval: 60s
    unit_of_measurement: '%'
    accuracy_decimals: 0
    lambda: !lambda |-
      if (id(wifi_sig).state < -92.0) {
        return 100.0;
      } else if (id(wifi_sig).state > -21.0) {
        return 1.0;
      } else {
        return round(( -0.0154 * id(wifi_sig).state * id(wifi_sig).state )-( 0.3794 * id(wifi_sig).state ) + 98.182 );
      }

# 입력장치 정의
binary_sensor:
  # touch 1st
  #- platform: gpio
  #  internal: true
  #  pin:
  #    number: GPIO12
  #    mode: INPUT
  #    inverted: True
  #  name: "touch1"
  #  on_press:
  #    - switch.toggle: button1

  # touch 2st
  - platform: gpio
    internal: true
    pin:
      number: GPIO3
      mode: INPUT
      inverted: True
    name: "touch2"
    on_press:
      - switch.toggle: button2

  # touch 3st
  #- platform: gpio
  #  internal: true
  #  pin:
  #    number: GPIO5
  #    mode: INPUT
  #    inverted: True
  #  name: "touch3"
  #  on_press:
  #    - switch.toggle: button3

# 동작버튼 = 출력장치 정의
switch:
  # Button 1 / Relay 1st
  #- platform: gpio
  #  name: ${device_name} Button1"
  #  pin: GPIO13
  #  id: button1
  #  icon: "mdi:lightbulb"
  #  on_turn_on:
  #    - switch.turn_on: led1
  #  on_turn_off:
  #    - switch.turn_off: led1

  # Button 2 / Relay 2st
  - platform: gpio
    name: ${device_name} Button1"  # <-- RENAME
    pin: GPIO4
    id: button2
    icon: "mdi:lightbulb"
    on_turn_on:
      - switch.turn_on: led2
    on_turn_off:
      - switch.turn_off: led2

  # Button 3 / Relay 3st
  #- platform: gpio
  #  name: ${device_name} Button3"
  #  pin: GPIO15
  #  id: button3
  #  icon: "mdi:lightbulb"
  #  on_turn_on:
  #    - switch.turn_on: led3
  #  on_turn_off:
  #    - switch.turn_off: led3

  # LED 정의
  # LED 1st
  #- platform: gpio
  #  internal: true
  #  name: "LED1"
  #  pin: GPIO16
  #  id: led1

  # LED 2st
  - platform: gpio
    internal: true
    name: "LED2"
    pin: GPIO14
    id: led2

  # LED 3st
  #- platform: gpio
  #  internal: true
  #  name: "LED3"
  #  pin: GPIO2
  #  id: led3

# 상태ED 정의
status_led:
  pin:
    number: GPIO0
    # inverted: yes
2) 2gang 벽스위치
## MoseHouse 2touch switch
## 딸아이방

substitutions:
  node_name: mosehouse02_2touch
  device_name: MoseHouse02 2Touch

esphome:
  name: ${node_name}
  platform: ESP8266
  board: esp01_1m
  on_boot:
    priority: -50
    then:
      - delay: 10s
      - homeassistant.service:
          service: notify.theniz_telegram
          data:
            message: "Esphome ${device_name}이(가) 시작 되었습니다."

wifi:
  ssid: # WiFi SSID 기록
  password: # WiFi 암호 기록

logger:

api:

ota:

time:
  - platform: sntp
    timezone: UTC-9
    servers:
      - time.bora.net
      - 0.pool.ntp.org
      - 1.pool.ntp.org

sensor:
  - platform: wifi_signal
    name: "${device_name} Wifi Signal"
    id: wifi_sig
    internal: true
    update_interval: 60s
  - platform: template
    name: "${device_name} Wifi Quality"
    icon: "mdi:wifi"
    update_interval: 60s
    unit_of_measurement: '%'
    accuracy_decimals: 0
    lambda: !lambda |-
      if (id(wifi_sig).state < -92.0) {
        return 100.0;
      } else if (id(wifi_sig).state > -21.0) {
        return 1.0;
      } else {
        return round(( -0.0154 * id(wifi_sig).state * id(wifi_sig).state )-( 0.3794 * id(wifi_sig).state ) + 98.182 );
      }

# 입력장치 정의
binary_sensor:
  # touch 1st
  - platform: gpio
    internal: true
    pin:
      number: GPIO12
      mode: INPUT
      inverted: True
    name: "touch1"
    on_press:
      - switch.toggle: button1

  # touch 2st
  #- platform: gpio
  #  internal: true
  #  pin:
  #    number: GPIO3
  #    mode: INPUT
  #    inverted: True
  #  name: "touch2"
  #  on_press:
  #    - switch.toggle: button2

  # touch 3st
  - platform: gpio
    internal: true
    pin:
      number: GPIO5
      mode: INPUT
      inverted: True
    name: "touch3"
    on_press:
      - switch.toggle: button3

# 동작버튼 = 출력장치 정의
switch:
  # Button 1 / Relay 1st
  - platform: gpio
    name: ${device_name} Button1"
    pin: GPIO13
    id: button1
    icon: "mdi:lightbulb"
    on_turn_on:
      - switch.turn_on: led1
    on_turn_off:
      - switch.turn_off: led1

  # Button 2 / Relay 2st
  #- platform: gpio
  #  name: ${device_name} Button2"
  #  pin: GPIO4
  #  id: button2
  #  icon: "mdi:lightbulb"
  #  on_turn_on:
  #    - switch.turn_on: led2
  #  on_turn_off:
  #    - switch.turn_off: led2

  # Button 2 / Relay 3st
  - platform: gpio
    name: ${device_name} Button2"  # <-- rename
    pin: GPIO15
    id: button3
    icon: "mdi:lightbulb"
    on_turn_on:
      - switch.turn_on: led3
    on_turn_off:
      - switch.turn_off: led3

  # LED 정의
  # LED 1st
  - platform: gpio
    internal: true
    name: "LED1"
    pin: GPIO16
    id: led1

  # LED 2st
  #- platform: gpio
  #  internal: true
  #  name: "LED2"
  #  pin: GPIO14
  #  id: led2

  # LED 3st
  - platform: gpio
    internal: true
    name: "LED3"
    pin: GPIO2
    id: led3

# 상태ED 정의
status_led:
  pin:
    number: GPIO0
    # inverted: yes
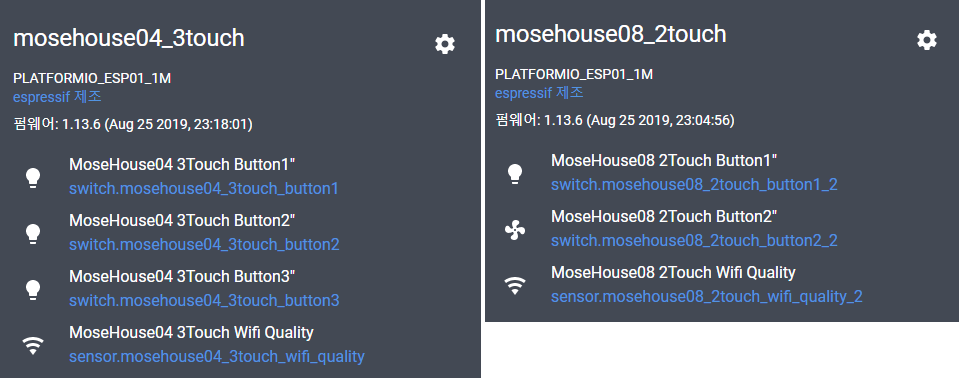
3) 3gang 벽스위치
## MoseHouse 3touch switch
## 거실

substitutions:
  node_name: mosehouse04_3touch
  device_name: MoseHouse04 3Touch

esphome:
  name: ${node_name}
  # platform: ESP8266
  # board: d1_mini
  platform: ESP8266
  board: esp01_1m
  on_boot:
    priority: -50
    then:
      - delay: 10s
      - homeassistant.service:
          service: notify.theniz_telegram
          data:
            message: "Esphome ${device_name}이(가) 시작 되었습니다."

wifi:
  ssid: # WiFi SSID 기록
  password: # WiFi 암호 기록

logger:

api:

ota:

time:
  - platform: sntp
    timezone: UTC-9
    servers:
      - time.bora.net
      - 0.pool.ntp.org
      - 1.pool.ntp.org

sensor:
  - platform: wifi_signal
    name: "${device_name} Wifi Signal"
    id: wifi_sig
    internal: true
    update_interval: 60s
  - platform: template
    name: "${device_name} Wifi Quality"
    icon: "mdi:wifi"
    update_interval: 60s
    unit_of_measurement: '%'
    accuracy_decimals: 0
    lambda: !lambda |-
      if (id(wifi_sig).state < -92.0) {
        return 100.0;
      } else if (id(wifi_sig).state > -21.0) {
        return 1.0;
      } else {
        return round(( -0.0154 * id(wifi_sig).state * id(wifi_sig).state )-( 0.3794 * id(wifi_sig).state ) + 98.182 );
      }

# 입력장치 정의
binary_sensor:
  # touch 1st
  - platform: gpio
    internal: true
    pin:
      number: GPIO12
      mode: INPUT
      inverted: True
    name: "touch1"
    on_press:
      - switch.toggle: button1
  # touch 2st
  - platform: gpio
    internal: true
    pin:
      number: GPIO3
      mode: INPUT
      inverted: True
    name: "touch2"
    on_press:
      - switch.toggle: button2
  # touch 3st
  - platform: gpio
    internal: true
    pin:
      number: GPIO5
      mode: INPUT
      inverted: True
    name: "touch3"
    on_press:
      - switch.toggle: button3

# 동작버튼 = 출력장치 정의
switch:
  # Button 1 / Relay 1st
  - platform: gpio
    name: ${device_name} Button1"  # Relay1
    pin: GPIO13
    id: button1
    icon: "mdi:lightbulb"
    on_turn_on:
      - switch.turn_on: led1
    on_turn_off:
      - switch.turn_off: led1
  # Button 2 / Relay 2st
  - platform: gpio
    name: ${device_name} Button2"  # Relay2
    pin: GPIO4
    id: button2
    icon: "mdi:lightbulb"
    on_turn_on:
      - switch.turn_on: led2
    on_turn_off:
      - switch.turn_off: led2
  # Button 3 / Relay 3st
  - platform: gpio
    name: ${device_name} Button3"  # Relay3
    pin: GPIO15
    id: button3
    icon: "mdi:lightbulb"
    on_turn_on:
      - switch.turn_on: led3
    on_turn_off:
      - switch.turn_off: led3

  # LED 정의
  # LED 1st
  - platform: gpio
    internal: true
    name: "LED1"
    pin: GPIO16
    id: led1
  # LED 2st
  - platform: gpio
    internal: true
    name: "LED2"
    pin: GPIO14
    id: led2
  # LED 3st
  - platform: gpio
    internal: true
    name: "LED3"
    pin: GPIO2
    id: led3

# 상태ED 정의
status_led:
  pin:
    number: GPIO0
    # inverted: yes
4) 2gang 전등/환풍기 벽스위치 (환풍기 8분 타이머) - 화장실용
## MoseHouse 2touch switch
## 화장실2/환풍기

substitutions:
  node_name: mosehouse08_2touch
  device_name: MoseHouse08 2Touch

esphome:
  name: ${node_name}
  platform: ESP8266
  board: esp01_1m
  on_boot:
    priority: -50
    then:
      - delay: 10s
      - homeassistant.service:
          service: notify.theniz_telegram
          data:
            message: "Esphome ${device_name}이(가) 시작 되었습니다."

wifi:
  ssid: # WiFi SSID 기록
  password: # WiFi 암호 기록

logger:

api:

ota:

time:
  - platform: sntp
    timezone: UTC-9
    servers:
      - time.bora.net
      - 0.pool.ntp.org
      - 1.pool.ntp.org

sensor:
  - platform: wifi_signal
    name: "${device_name} Wifi Signal"
    id: wifi_sig
    internal: true
    update_interval: 60s
  - platform: template
    name: "${device_name} Wifi Quality"
    icon: "mdi:wifi"
    update_interval: 60s
    unit_of_measurement: '%'
    accuracy_decimals: 0
    lambda: !lambda |-
      if (id(wifi_sig).state < -92.0) {
        return 100.0;
      } else if (id(wifi_sig).state > -21.0) {
        return 1.0;
      } else {
        return round(( -0.0154 * id(wifi_sig).state * id(wifi_sig).state )-( 0.3794 * id(wifi_sig).state ) + 98.182 );
      }

# 입력장치 정의
binary_sensor:
  # touch 1st
  - platform: gpio
    internal: true
    pin:
      number: GPIO12
      mode: INPUT
      inverted: True
    name: "touch1"
    on_press:
      - switch.toggle: button1

  # touch 2st
  #- platform: gpio
  #  internal: true
  #  pin:
  #    number: GPIO3
  #    mode: INPUT
  #    inverted: True
  #  name: "touch2"
  #  on_press:
  #    - switch.toggle: button2

  # touch 3st
  - platform: gpio
    internal: true
    pin:
      number: GPIO5
      mode: INPUT
      inverted: True
    name: "touch3"
    on_press:
      - switch.toggle: button3

# 동작버튼 = 출력장치 정의
switch:
  # Button 1 / Relay 1st
  - platform: gpio
    name: ${device_name} Button1"
    pin: GPIO13
    id: button1
    icon: "mdi:lightbulb"
    on_turn_on:
      - switch.turn_on: led1
    on_turn_off:
      - switch.turn_off: led1
      - if:
          condition:
            switch.is_on: button3
          then:
            - delay: 480s
            - switch.turn_off: button3

  # Button 2 / Relay 2st
  #- platform: gpio
  #  name: ${device_name} Button2"
  #  pin: GPIO4
  #  id: button2
  #  icon: "mdi:lightbulb"
  #  on_turn_on:
  #    - switch.turn_on: led2
  #  on_turn_off:
  #    - switch.turn_off: led2

  # Button 2 / Relay 3st
  - platform: gpio
    name: ${device_name} Button2"  # <-- rename
    pin: GPIO15
    id: button3
    icon: "mdi:fan"  #<-- FAN icon
    on_turn_on:
      - switch.turn_on: led3
      #환풍기FAN 동작시
      - if:  # button 1 off 인 경우
          condition:
            switch.is_off: button1
          then:
            - delay: 480s                  # 480s=60s*8분
            - switch.turn_off: button3   # 버튼 OFF
    on_turn_off:
      - switch.turn_off: led3

  # LED 정의
  # LED 1st
  - platform: gpio
    internal: true
    name: "LED1"
    pin: GPIO16
    id: led1

  # LED 2st
  #- platform: gpio
  #  internal: true
  #  name: "LED2"
  #  pin: GPIO14
  #  id: led2

  # LED 3st
  - platform: gpio
    internal: true
    name: "LED3"
    pin: GPIO2
    id: led3

# 상태ED 정의
status_led:
  pin:
    number: GPIO0
    # inverted: yes
2. "Home Assistant 설정 > 통합 구성요소 > (+)버튼 >ESPHome > IP를 등록(공유기에서 확인)"
IP를 등록하면 아래와 같이 등록됩니다.
'Raspberry Pi' 카테고리의 다른 글
| 라즈베리파이4 용 부팅용 USB-SSD 백업방법에 대한 시행착오 (0) | 2022.02.07 |
|---|---|
| [개념이해] ESP-12 bootloader mode(프로그래밍 모드) (0) | 2019.08.24 |
| 1. MoseHouse 터치 벽스위치에 ESPHome을 설치하는 방법 (0) | 2019.08.21 |